
Field Complete is the mobile app for field service management. It helps you manage your work orders, crew schedules, and invoicing. It's easy to use and helps you stay organized in the field.
Step 1: (Receiving the Job)
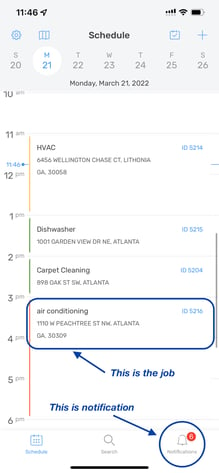
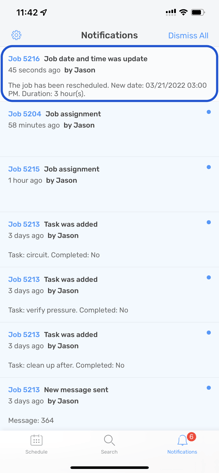
When a job is scheduled, you will receive a notification and the job will be placed on your schedule for the day.
. 
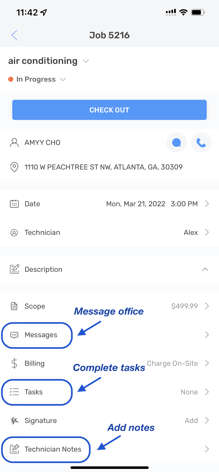
Step 2: (Job Information)
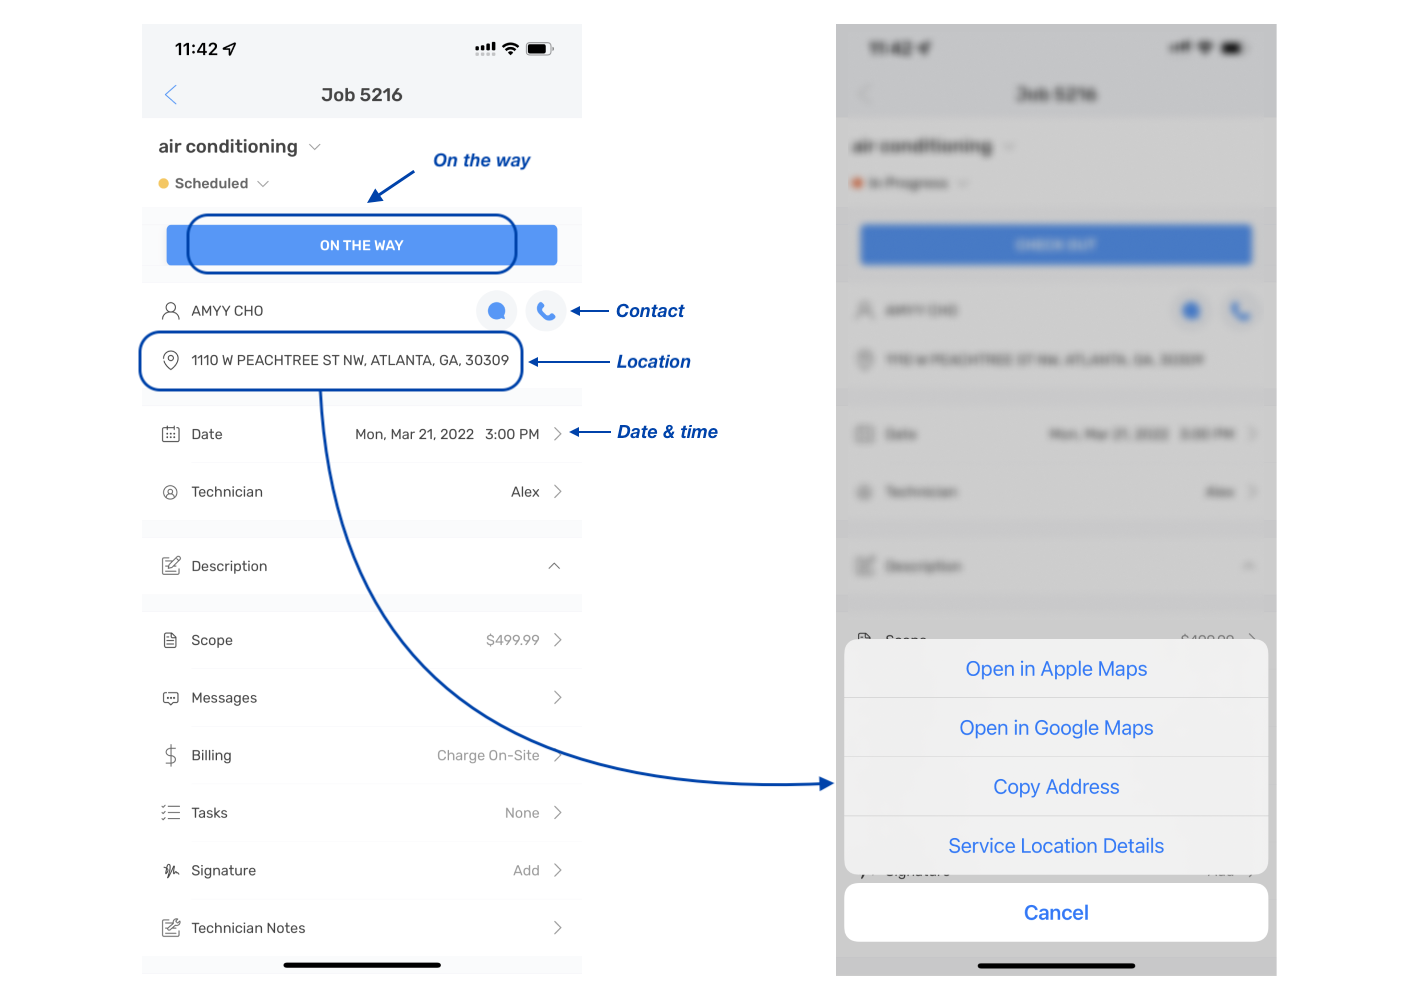
When you select the job, you will see all the information in regard to the job. Click on description to see additional information related to the job.
Step 3: (On the Way)
Once you are on the way, you will click the blue “ON THE WAY” button.
Below the “On the way” button, there are icons to call or text the customer if need be.
Step 4: (Check In)
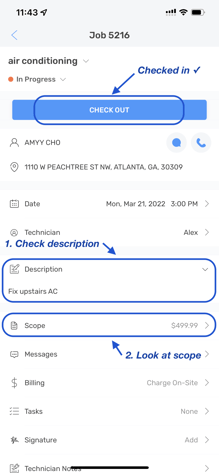
Once you arrive to the job location, click “CHECK IN” to notify the office that you are on site and the job is in progress.

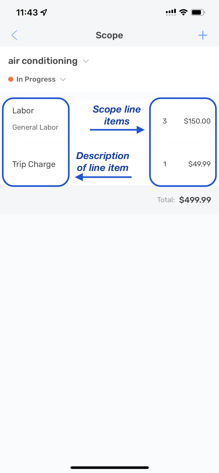
Step 5: (Creating Scope of Work)
Click on “SCOPE” if there are already line items added then follow the scope as it is.
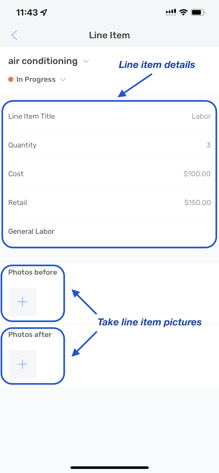
If you want to add pictures per line item, you can do so under the scope by clicking on the specific line item.
If you need to build the scope of work, go to “SCOPE” and click the “+” (on the top right) and add all the line items that are necessary.
Once you have selected the line item, click “CREATE” on the top right to add it to your scope.
Scope:
Line item:
Step 6: (Tasks)
If there are additional tasks on the job, click on the tasks tab and as you complete, check the buttons off.
Field Complete Mobile App: 1
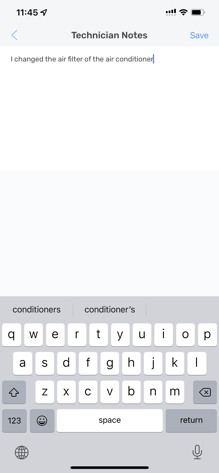
Notes:
Step 7: (Adding Images)
Once the work is complete, to add additional images go to “ADDITIONAL IMAGES” and click on the “+” to add all of the before and after images and any images related to the job.
Step 8: (Adding Signature)
If a signature is required for the job, click on the “SIGNATURE” tab and collect the customer signature and hit submit.
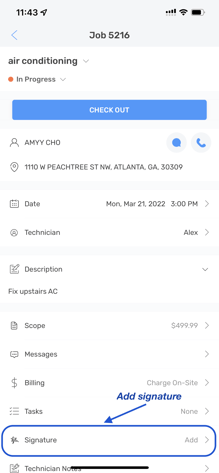
Signature:

Step 8: (Sending Invoice)
If billing is “BILL LATER” skip to Step 11.
After all work is complete, go to “BILLING” and then select “INVOICE” (on the top right) then hit “CREATE” (on the top right)
Billing: 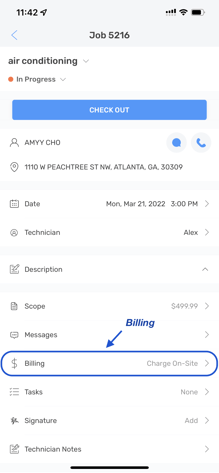
Invoice: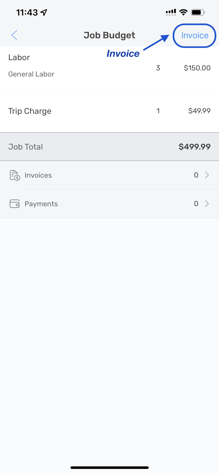
Create invoice: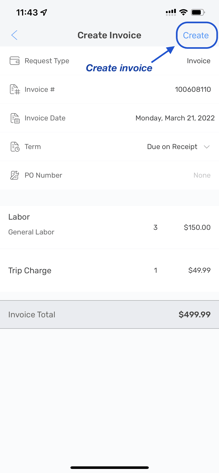
Then select “SEND INVOICE” on the bottom.

Then hit “SEND”
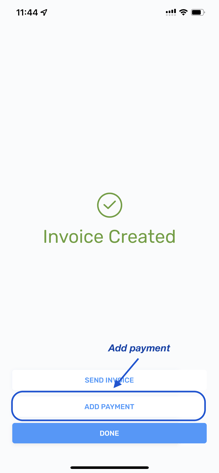
Step 9: (Adding Payment)
After the invoice is created, take payment by selecting “ADD PAYMENT”
After you select “ADD PAYMENT” it will ask you to put in all necessary payment information, then can click “ADD” (top right)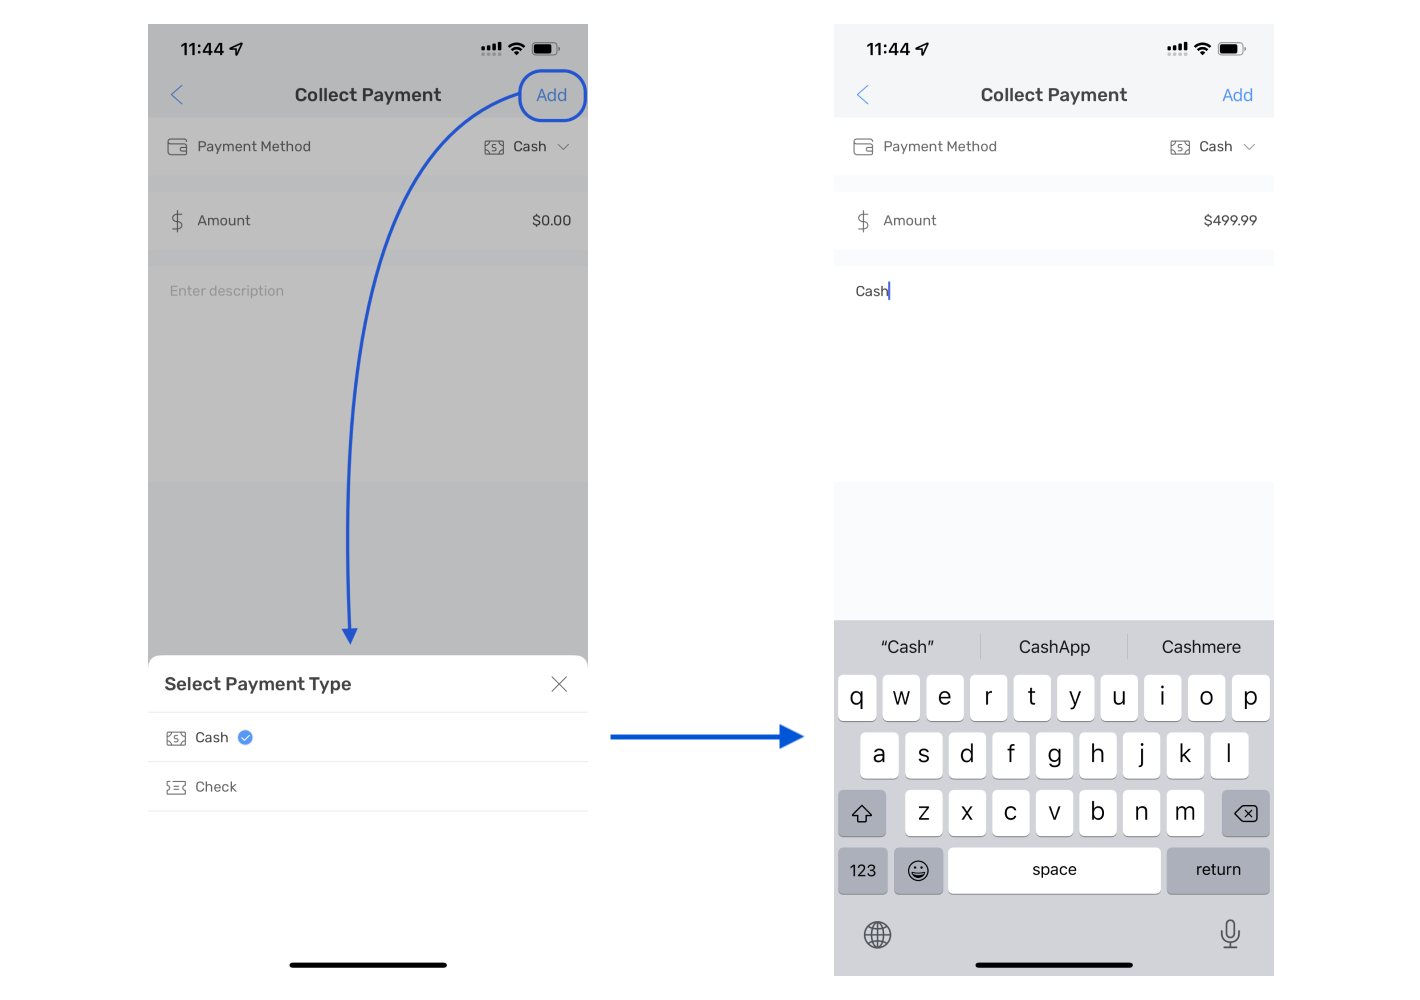
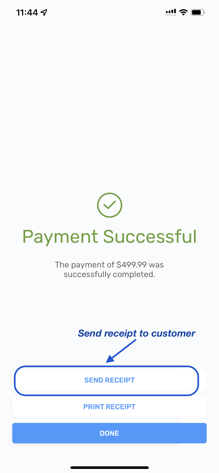
Step 10: (Sending Receipt)
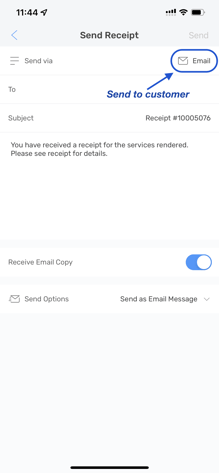
After the payment has been processed, you can send the receipt by clicking “SEND RECEIPT”
The receipt will be sent to the email that is provided upon job creation, or you can change the email to whatever the customer requests.
Step 11: (Check Out)
After the receipt has been sent, you can go ahead and “CHECK OUT” of the job and move on to the next one.
